Difference between revisions of "SQL Backup"
Jump to navigation
Jump to search
| Line 3: | Line 3: | ||
==Creating a backup with SQL 2005== | ==Creating a backup with SQL 2005== | ||
| − | # | + | #Log onto the server that you need to create the backup on |
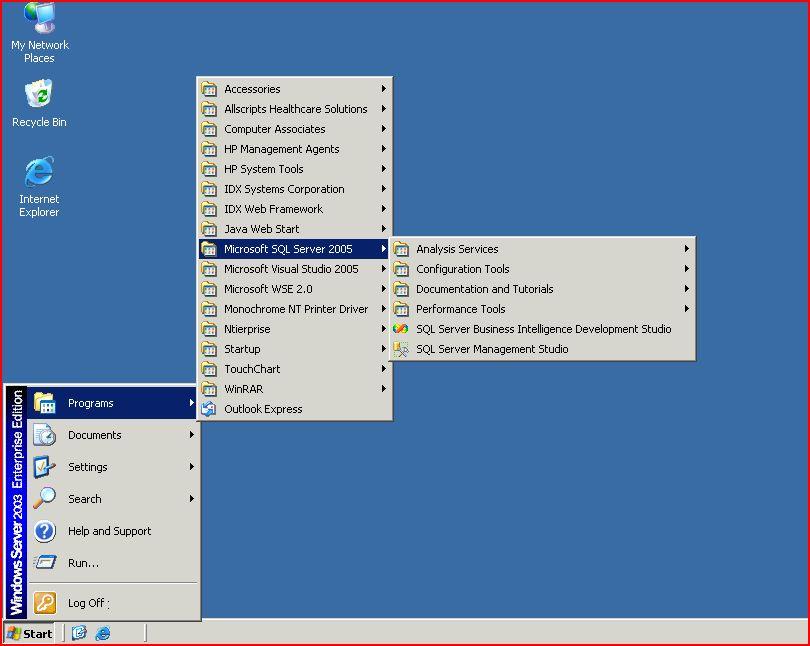
| − | # | + | #Go to Start/Programs/Microsoft SQL Server 2005/SQL Server Management Studio[[Image:Start-Programs.jpg]] |
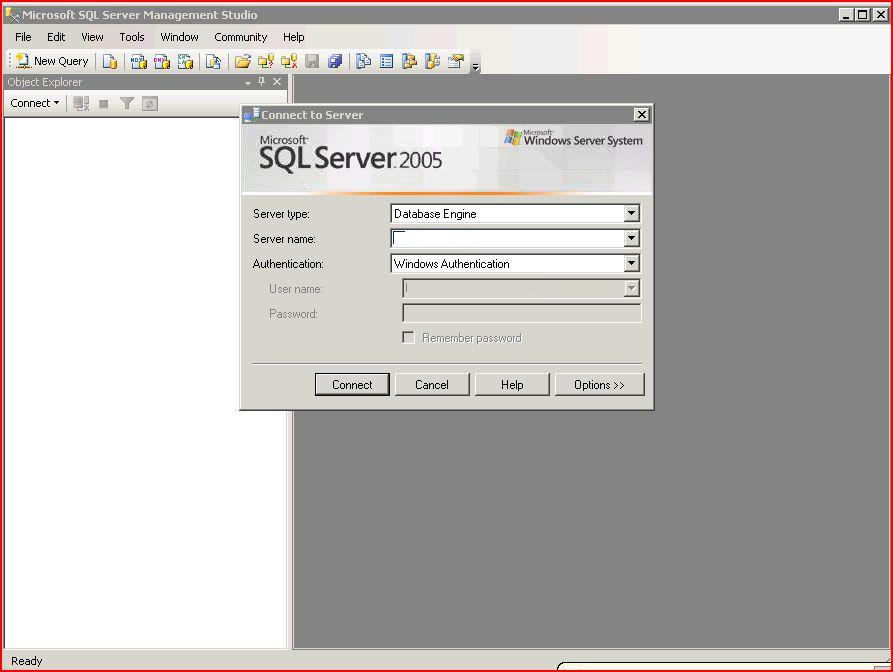
| − | [[Image:Start-Programs.jpg]] | + | #The first prompt will ask you to which server to connect to. Supply the proper information and hit <Connect>[[Image:Server_Connection.jpg]] |
| − | # | + | #Expand Databases |
| − | [[Image:Server_Connection.jpg]] | + | #Right-click the database you wish to backup |
| − | # | + | #Select Tasks/Backup[[Image:Bacukup_selection.jpg]] |
| − | # | + | #The following page will appear:[[Image:BackupOptions.jpg]] |
| − | # | + | #If anything appears in the Destination section as shown above, highlight the entry and hit remove.[[Image:BackupOptionsCleared.jpg]] |
| − | [[Image:Bacukup_selection.jpg]] | + | #When everything has been removed, select the <Add> button. |
| − | # | + | #The following prompt will appear:[[Image:BackupDestination.jpg]] |
| − | [[Image:BackupOptions.jpg]] | + | #Select the elipses and browse to your preferred path and provide a detailed filename. Ensure that you have enough disk space free to hold the backup. |
| − | # | ||
| − | [[Image:BackupOptionsCleared.jpg]] | ||
| − | # | ||
| − | # | ||
| − | [[Image:BackupDestination.jpg]] | ||
| − | # | ||
# Press <OK> until you get back to this screen: | # Press <OK> until you get back to this screen: | ||
[[Image:BackupOptionswithDestination.jpg]] | [[Image:BackupOptionswithDestination.jpg]] | ||
Revision as of 16:54, 1 July 2013
Description
This page will describe the steps necessary to perform a manual SQL backup. Backups should be created before making any major changes to a database to ensure you can restore them if necessary:
Creating a backup with SQL 2005
- Log onto the server that you need to create the backup on
- Go to Start/Programs/Microsoft SQL Server 2005/SQL Server Management Studio
- The first prompt will ask you to which server to connect to. Supply the proper information and hit <Connect>
- Expand Databases
- Right-click the database you wish to backup
- Select Tasks/Backup

- The following page will appear:
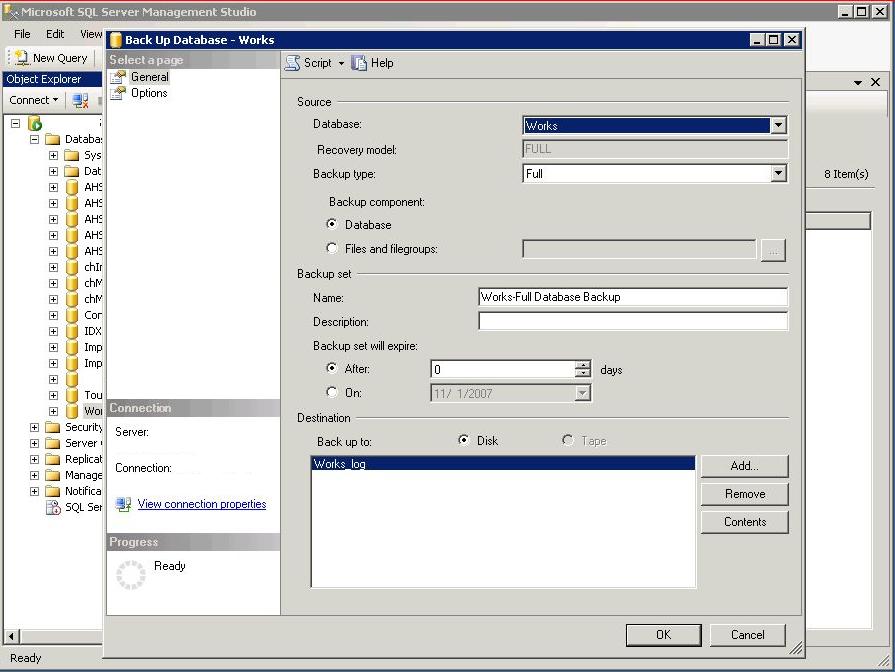
- If anything appears in the Destination section as shown above, highlight the entry and hit remove.
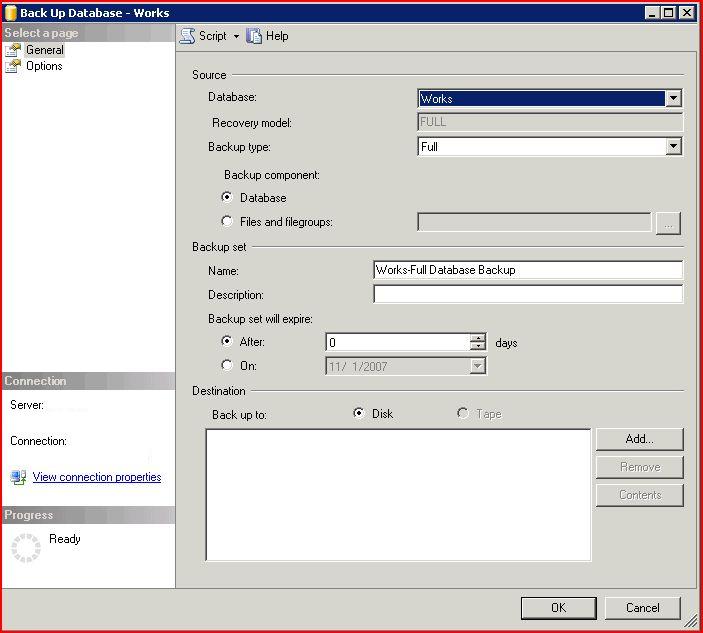
- When everything has been removed, select the <Add> button.
- The following prompt will appear:
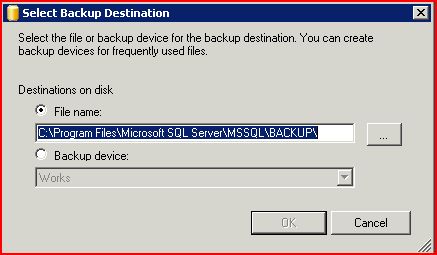
- Select the elipses and browse to your preferred path and provide a detailed filename. Ensure that you have enough disk space free to hold the backup.
- Press <OK> until you get back to this screen:


- When everything is ready to be backed up, press <OK>
- While the backup is executing you will see the progress in the bottom left hand corner as shown here:

- When it is finished the following screen will appear:

- Press <OK>
- If done with SQL close out of the program, you're finished.