Difference between revisions of "Results Verification Process"
Carl.Fulton (talk | contribs) |
Carl.Fulton (talk | contribs) |
||
| Line 9: | Line 9: | ||
== Training Tips == | == Training Tips == | ||
| − | • Use the bottom half of the result verification dialog box to auto-populate the result document/letter. | + | • Use the bottom half of the result verification dialog box to auto-populate the result document/letter. This is depending on Note Admin setup of the document and the output template. |
• The “Message to Staff” window can be used to populate both the task and the result document. User/Providers will find that useful so they do not have to spend time populating each text field. | • The “Message to Staff” window can be used to populate both the task and the result document. User/Providers will find that useful so they do not have to spend time populating each text field. | ||
Latest revision as of 19:49, 25 October 2010
There are multiple input screens presented when verifying a result(s).
The images below define how each field behaves.
Top Half Detail
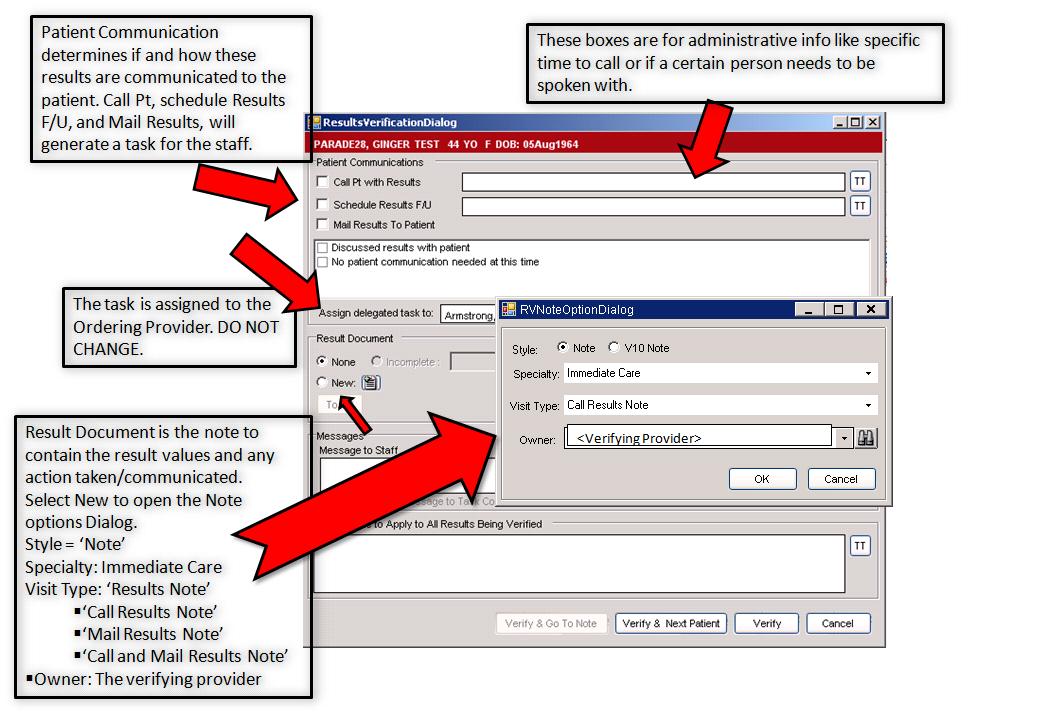

Bottom Half Detail


Training Tips
• Use the bottom half of the result verification dialog box to auto-populate the result document/letter. This is depending on Note Admin setup of the document and the output template.
• The “Message to Staff” window can be used to populate both the task and the result document. User/Providers will find that useful so they do not have to spend time populating each text field.
• If “None” is selected for the result document, the verifying provider can use the add annotations quickly by using the bottom text field.
• Using the Result Verification with a v11 Note is a great introduction to v11 Note for User/Providers. If your organization is not live on v11 Note, but is looking to convert to v11 Note then use the Result Verification Process to introduce module.