Difference between revisions of "MEDITECH MPM Physician Workflow"
Kavon.Kaboli (talk | contribs) |
Kavon.Kaboli (talk | contribs) |
||
| Line 249: | Line 249: | ||
:5. When editing is completed, click OK. | :5. When editing is completed, click OK. | ||
:6. If you will need to go back and edit more, click the Save as In Process button. | :6. If you will need to go back and edit more, click the Save as In Process button. | ||
| + | [[File:MPMPhysWFImage52.jpg]] | ||
:7. If letter is ready to be processed, select the Save button. | :7. If letter is ready to be processed, select the Save button. | ||
| − | :8. Select Complete and Print Queue or Complete and Print. | + | :8. Select Complete and Print Queue or Complete and Print. |
[[File:MPMPhysWFImage53.jpg]] | [[File:MPMPhysWFImage53.jpg]] | ||
:9. Click Save. When you return to the results, there will be a message attached stating "Letter Completed" and the status associated with it. | :9. Click Save. When you return to the results, there will be a message attached stating "Letter Completed" and the status associated with it. | ||
Revision as of 22:38, 20 May 2015
Accessing MPM
Double click the Desktop Icon to open MPM:
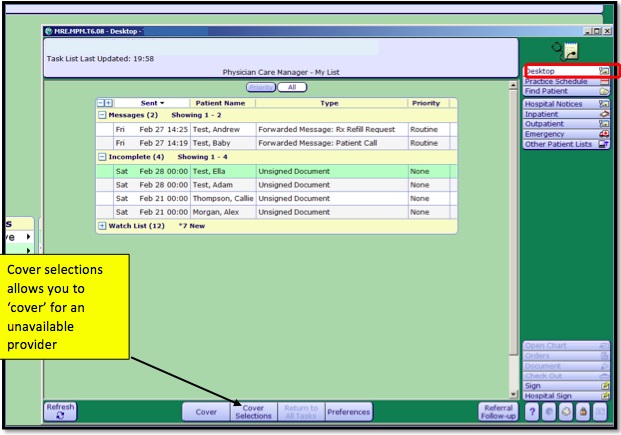
Desktop
Your Desktop is the first thing you see when you log in. It is your task list. Best practice is to monitor throughout the day, especially first thing and at the end of the day. Any patient messages, unsigned documents, prescription renewal, results and so on will show here. You can also click on the Sign button to sign documents/orders that are in a status of unsigned.
Schedule
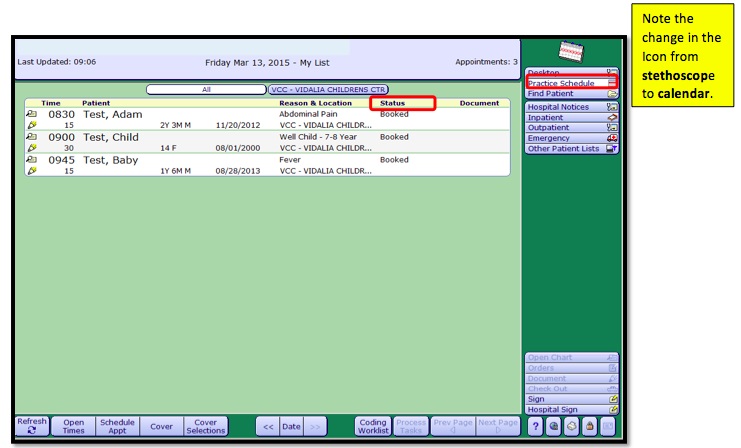
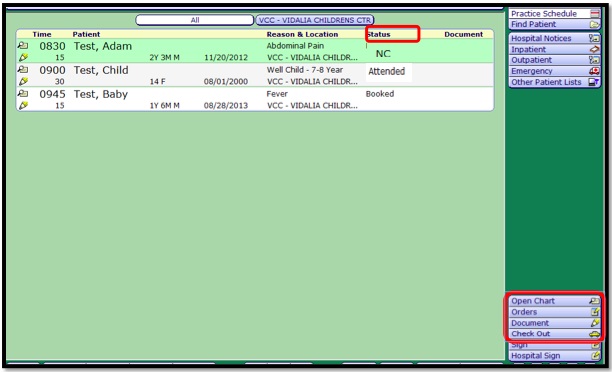
Click on Practice Schedule to bring up your schedule for the day:
The Status column displays the Patient Status. Attended signifies that the patient has checked in. NC alerts the provider that the nurse has completed the patient intake and the provider can begin the patient exam. In Process under Document indicates that the nurse has opened the visit note.
Click on a patient to bring them into context:
Once the patient is in context, the patient name and information for visit is highlighted and the Chart buttons will be available to select.
Patient Summary
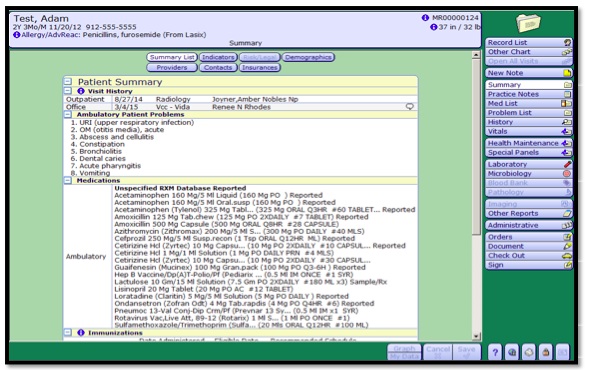
To open Chart to Patient Summary:
The Patient Summary is like a ‘snapshot’ of all patient information. In the Summary, you will find Visit History, Ambulatory Problems, Meds, Immunizations, Growth Charts and Health Maintenance items.
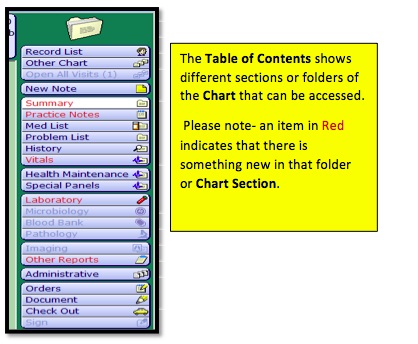
Document for Encounter
To open the Document for the encounter:
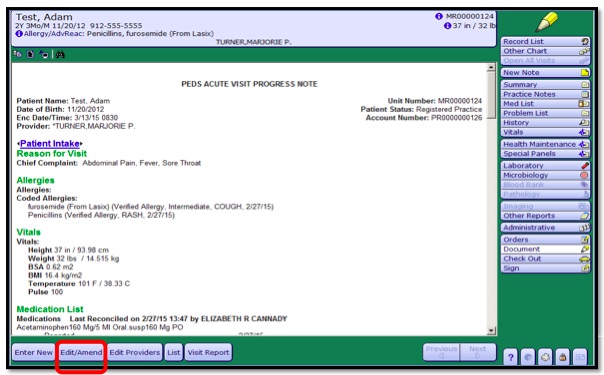
This will bring you to the Document associated with the Appointment Encounter
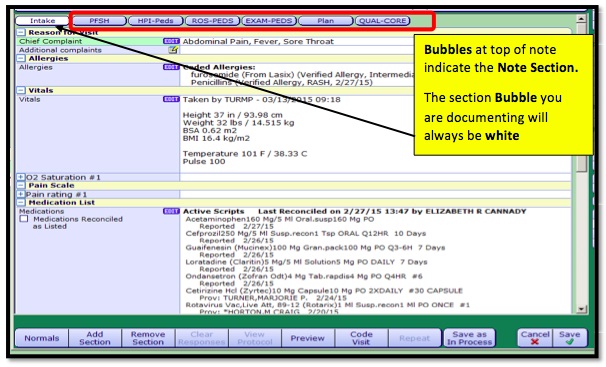
- 3. Select Edit/Amend to begin your documentation.
Normals
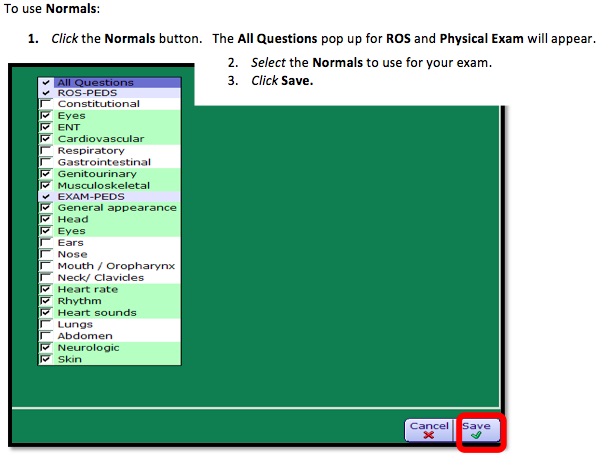
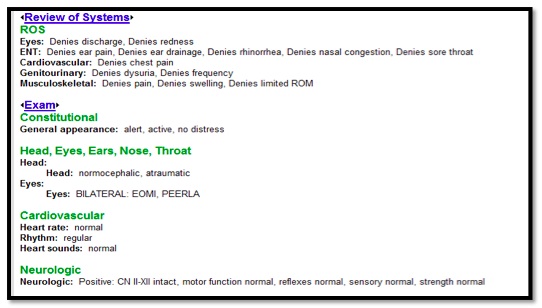
Normals allow for users to add specific “Normals” or documentation elements to the ROS and PE sections of your note template.
The All Questions pop up for ROS and Physical Exam will appear. Select the pertinent organ/body systems you would like to document normals for OR select the document section (i.e. ROS or Physical Exam) check box to select ALL normals for that section.
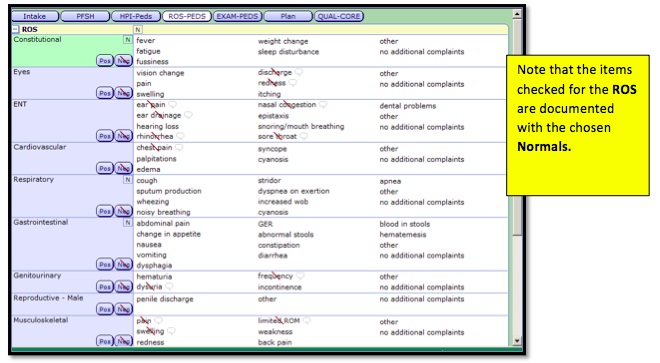
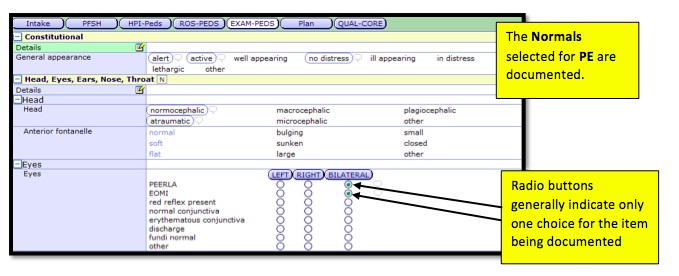
Below is a Preview of the documentation as it would be seen in the actual note:
In the event that your Normals do not fit the current patient, you have the ability to go back and document by exception, removing the irrelevant documentation and if needed, adding additional documentation.
To further define documentation on an item:
- 1. Click on the item. A Comment Box will open at the bottom of the page.
- 2. Enter in the documentation.
In the note, the comment will show in parenthesis after the item
Adding Free and “Canned” Text
- 1. To add free or canned text, click on the Pad of paper with pencil icon.
- 2. Type in your free text.
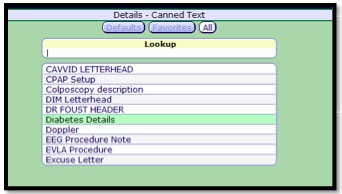
- 3. Click the Text button to use Canned text.

- 4. Search and select the Canned text to use.
- 5. Edit as needed, click OK.
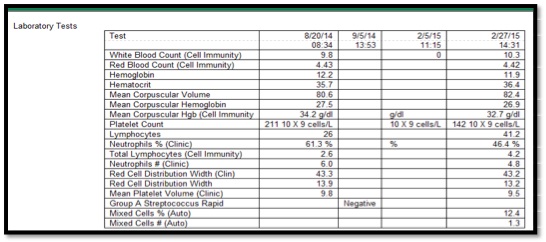
Citing Results
- 1. Click the Results button.
- 2. Double-click Ambulatory Results
- 3. Review and select the results you want in your note ( or just review and cancel if you don’t want in the note)
- 4. Click OK to insert into the note.
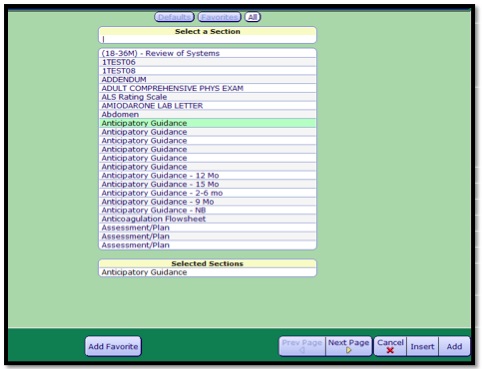
Adding or Removing a Note Section
You can add or remove a note section if needed for additional documentation or if a Note Section is not needed.
To add a Section:
- 1. Click the Add Section button
- 2. Search for the Section to add to the note template.
- 3. Click on the name to select the Section.
- 4. Click the Add button (best practice is to Add a Section, not Insert)
To Remove a Section:
- 1. Ensure the section you want removed is white.
- 2. Click the Remove Section button.
Signing the Visit Note Template
- 1. Click the Save as In Process button if you need edit your note at a later time( enter or remove documentation)
- 2. Click the Save button for Note Status choices
- 3. Select appropriate status and Save.
- 4. For a Signed status, enter your pin to Sign your note.
Assessment/Plan/Orders
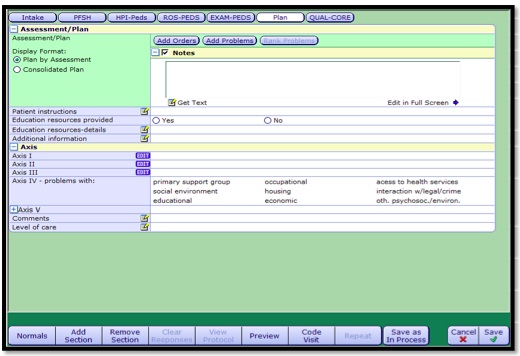
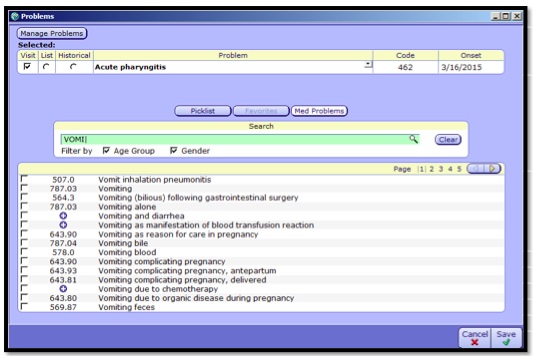
- 1. Click the Add Problems button to select your diagnoses for the visit. The Problems Dialog window will pop up.
- 2. Type in the search bar to find your problem ( generally less is more, abbreviations can be used)
- 3. Check the appropriate diagnosis.
- 4. Select the List button to add the problem to the patients Active Problem List.
- 5. Click Save. This will bring you back to the Plan.
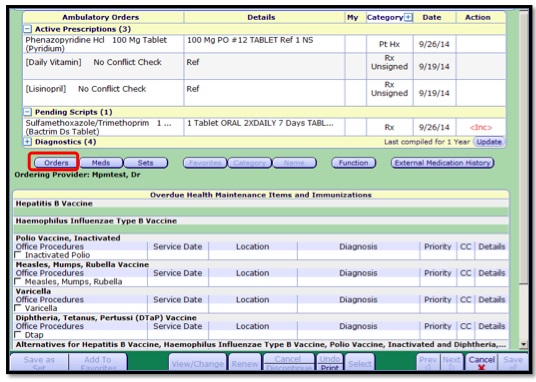
- 6. Select the Add Orders button. The Ambulatory Order Management (AOM) window will pop up.
To allow the provider to be aware, in addition to the Ordering Workspace, the AOM also contains the patient's current and pending orders.
To order a diagnostic test:
- 1. Select the Orders button.
- 2. Enter the test you need to order in the Orders Name Search field.
- 3. Click in the check box next to the order name to select. Some information may default in. You are required to enter the diagnosis.
- 4. Click on the Diagnosis to open the Problems Dialog window. Search for and select the appropriate diagnosis you are ordering for OR if the appropriate diagnosis is already in the problem list, select it.
- 5. Click Save.
- 6. Click the Add To Favorites button if this is a frequent order, or Save as Set when creating a Set.
To add a medication:
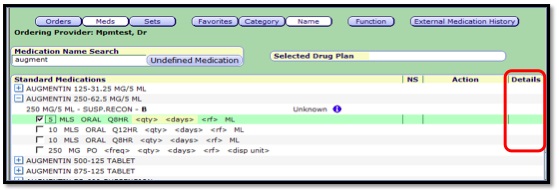
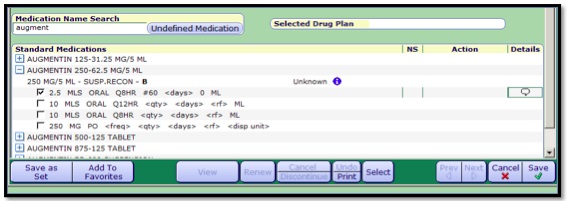
- 1. Click the Meds Button.
- 2. Enter the Medication to order in the Medication Name Search field.
- 3. Click the Plus sign next to the medication to order.
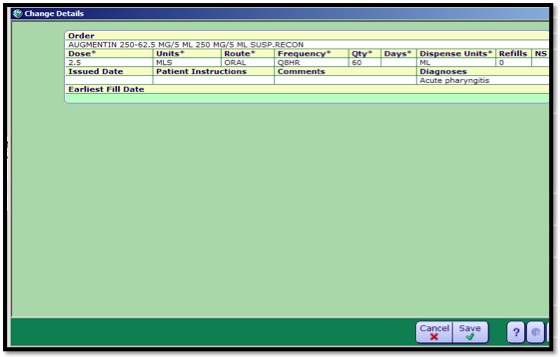
- 4. Select the appropriate dosing. Best Practice is to click in the details column to make changes to the dose, this opens the Change Details window to assist with easier editing access.
- 5. Click Save.
Repeat the above steps for as many orders/medications needed for the patient.
- 6. Once Ordering is complete, Click Save.
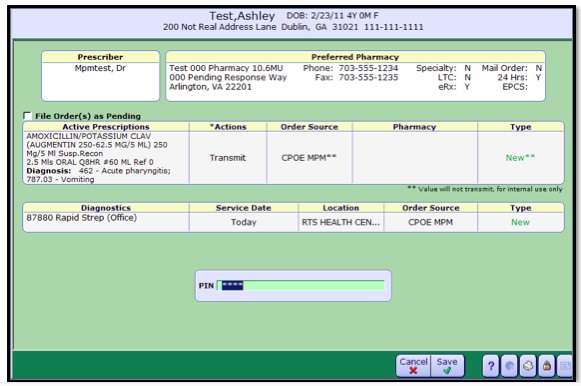
DUR will occur and if any interactions, allergies, etc.. you will be alerted, if not, the pharmacy screen and pin entry window will pop up.
- 7. Enter Preferred Pharmacy if needed.
- 8. Enter PIN
- 9. Click Save -- this will send the medications to the pharmacy and enter any orders for diagnostics into the system.
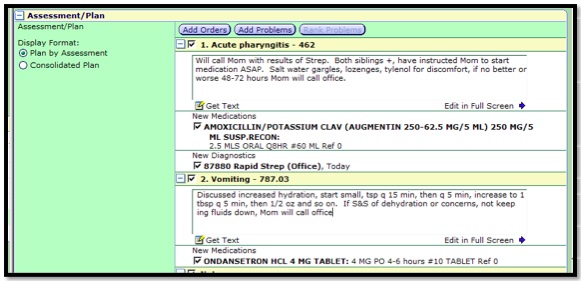
Clicking Save returns you to the patient Plan. You can use free or canned text or use Dragon to provide additional information to the Plan and can also document the education ordered for the patient.
Coding the Visit
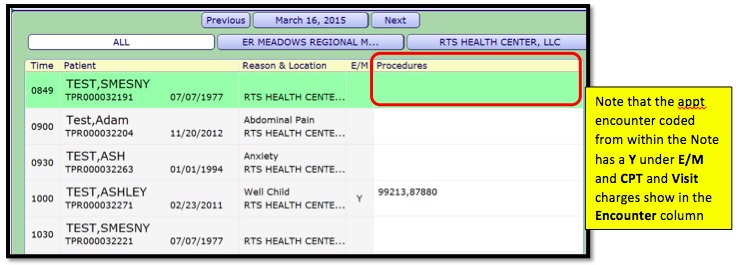
Coding can be completed from within the Note or by using the Coding Worklist button located on the Desktop. There are two ways to code the visit -- from within the note or from the Desktop.
To code the visit from within the Note:
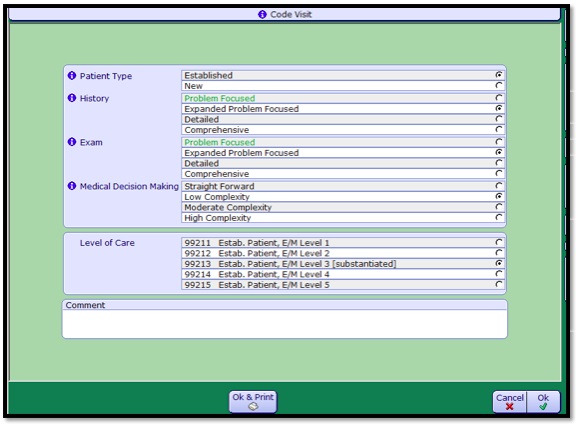
- 1. Click the Code Visit button. The Code Visit window will pop up
- 2. Review the code levels determined by the E/M coder based on your documentation.
- 3. Make changes as needed. Ultimately the decision making is performed by the provider -- the substantiations noted in the Code Visit window are simply suggestions based on discrete documentation. The E/M coder does not capture free text documentation.
- 4. Enter in your visit charge/Level of Care.
- 5. Click OK. If the note documentation is complete, you can now sign your note.
To code the visit from the Desktop:
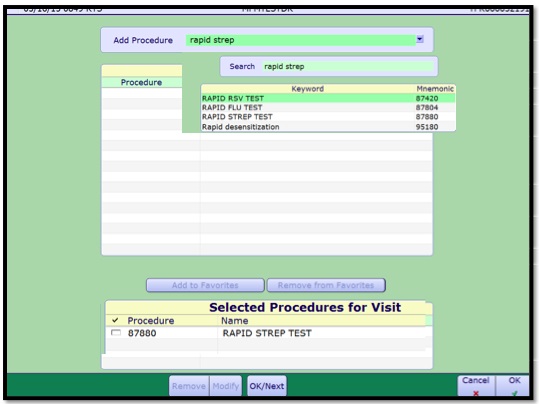
- 2. Select the patient to code. Click in the Procedures column. The Enter/Edit Procedures window will pop up.
- 3. Select appropriate codes.
- 4. Once complete, click either Ok/Next to go to next patient, or OK to go back to Coding Worklist.
Sending Messages/Tasking
To Send a Message:
- 1. Select patient from your desktop or click the Find Patient button .
- 2. Once the Chart is opened, click the New Note button
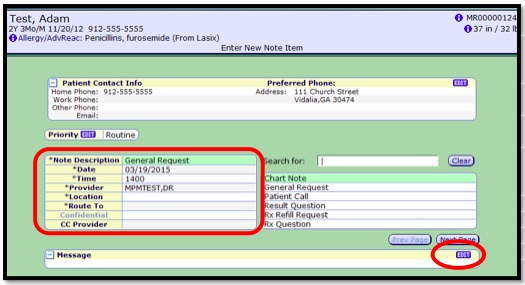
 . The Enter New Note Item window will open.
 - 3. Determine and select the Priority of the message. The default is Routine.
- 4. Select the Note Description. For this example we will use General Request
- 5. Enter in the Location.
- 6. Select the user to Route To.
- 7. If applicable, choose the CC Provider.
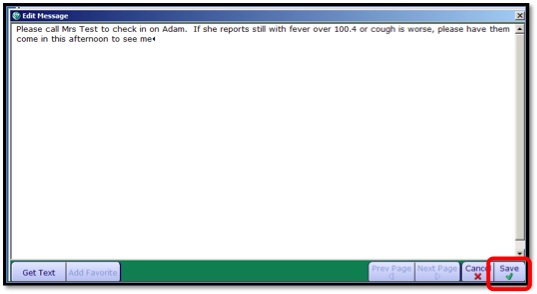
- 8. Click the Message Edit button to create your message.
- 9. Click Save. You will see your message and the message information.
- 10. Select Save to send your message.
Results Verification Workflow
Results Tasks are found under the Results Heading on the Desktop task list.
To Verify/Close a Results Task:
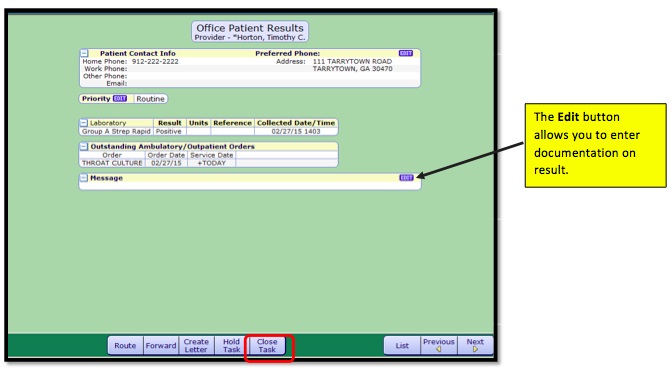
- 1. Select the patient Results Task you wish to review. In addition to Verifying/Closing, you will have several other options to choose once the result has been reviewed, including creating a message.
- 2. To Verify/Close, select the Close Task button. You will return to your task list and the Results Task you closed will be removed from your list. The item will show in the patient chart as completed.
- 3. In the event you need to document on the result prior to closing, select the Edit button.
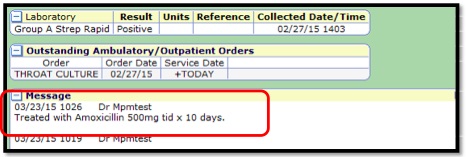
- 4. Enter your documentation and click Save. Your message will show on the result with your name and the date.
To Route Results:
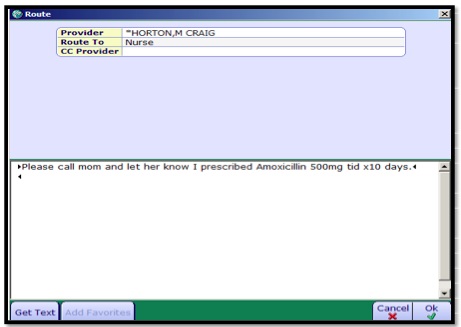
- 1. Click the Route button. The Route dialog window will appear.
- 2. Select the user you wish to Route to. You can also CC another Provider.
- 3. Enter in a message if needed.
- 4. Click OK.
To Forward Results:
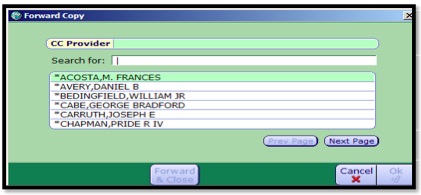
- 1. Click the Forward button. The Forward Copy dialog window will open.
- 2. Select the Provider to Forward.
- 3. Click OK.
To Create a Letter:
- 1. Click the Create Letter button
- 2. Select the appropriate Letter Type (ie: Results Letter)
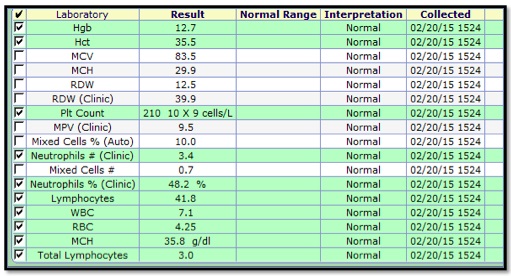
- 3. If all Results are to be included in the letter, click OK. (Excluding results? Uncheck and click OK.)
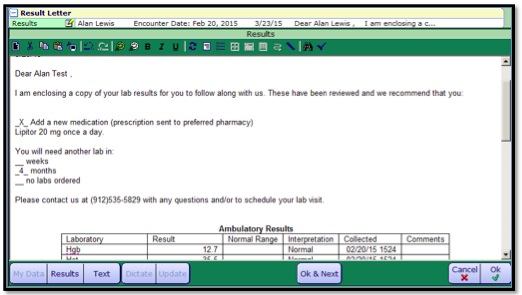
The Results Letter will open.
- 4. To edit, click the Edit Letter button.
- 5. When editing is completed, click OK.
- 6. If you will need to go back and edit more, click the Save as In Process button.
- 7. If letter is ready to be processed, select the Save button.
- 8. Select Complete and Print Queue or Complete and Print.
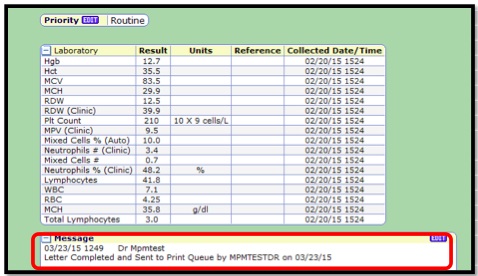
- 9. Click Save. When you return to the results, there will be a message attached stating "Letter Completed" and the status associated with it.
- 10. If not other actions needed, select Close Task to remove from task list.
Hold Results
Holding Results is used to hold the results until the system receives additional results if the patient has outstanding orders. You can also select Hold Task to delay additional follow-up on the results. The Held Office Patient Results task will change back to Office Patient Results task when one of the following occurs:
- One full day has passed
- The system receives an abnormal, report based or urgent priority result for the patient
- All outstanding orders are completed for the patient
To Hold a Results Task:
- 1. Select the Hold Task Button. Note that Office Patient Results is now in a status of Held and there is a message indicating the results are held and the user that selected that status.
Held tasks are found under the heading of Held Results.
