Analytics Analysis (Crosstabs)
Analysis, also known as Crosstabs, allows aggregation of data with Analytics. There are two types of Analysis Crosstabs - regular Crosstabs and Link Group Crosstabs.
Regular Crosstabs allow users to aggregate and explore data sets. For example, it might be beneficial to look at the prescribing habits of an organization. To that end, a user might build a Crosstab that includes the following: Medication, Prescribe Action (Record, Print, Retail, etc), Prescribing Provider, Drug Therapy Class, Pharmacy, Patient State/City, and so on. The crosstab would show the number of prescriptions by provider. Filters could be applied to remove Recorded prescriptions and look at counts by year. This gives users a way to see all prescriptions and the pharmacies that receive the most medications. Crosstabs allow in-depth exploration of data sets.
Link Group Crosstabs allow comparison between multiple data sets. For example, a link group crosstab could show, by provider, the number of patients on their panel (where they are the PCP), the number of diabetics in another column, the number of diabetics without an A1C in the past year in another, and the number of overdue tasks for that provider. With Link Group Crosstabs, a report can show summary information on a common dimension for various types of data.
Distinct Counts
When using Crosstabs, it can be beneficial to pull in distinct counts for items like patients. To do this, an Expression is used to calculate the distinct values. Here's an example of how to count distinct patients.
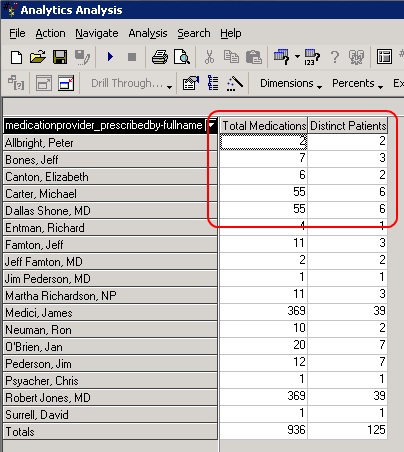
Note: The distinct patient count may differ if more than one slice/row/column dimension is included. This is because patients may be found under multiple sections within a slice/row/column dimension. As an example, imagine that medications are being counted by prescribing provider. If the PrescribeActionName field is added, the same patient might have medications under both Send to Retail and Print Rx. Due to the divisions in the data, that patient would be counted twice.
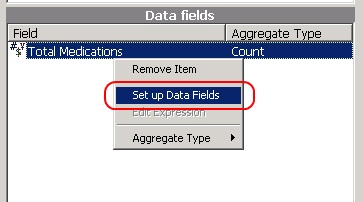
1) Once the Crosstab is setup, right-click in Data Fields and select Set up Data Fields.
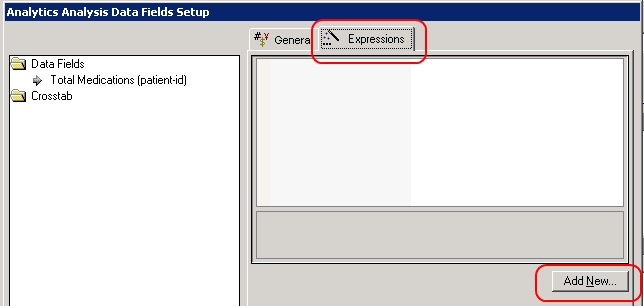
2) Select the Expressions tab, and click Add New...
3) When prompted to use existing fields, select No
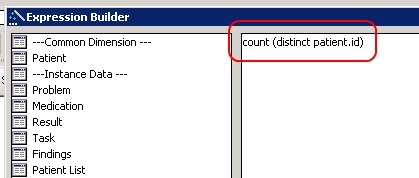
4) Create a new expression as "count ( distinct patient.id ) "
5) Name the field, click Parse and then click OK
6) When the Crosstab is run again, there is now a distinct patient count
Link Group Automapping
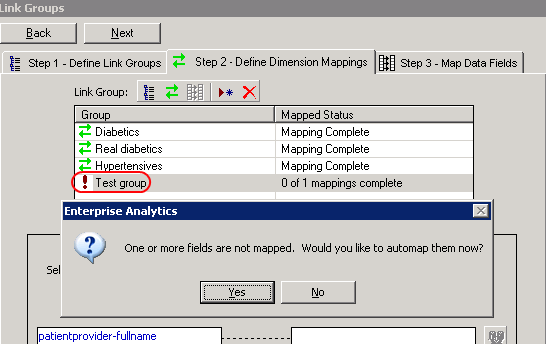
When creating a link group, it requires mapping fields between the crosstab and the link group. Normally this is accomplished with the Automap feature. Click on the group name and the following window should appear. Click yes.
If it doesn't map, manual mapping must be done. Click on the field; it should turn red.
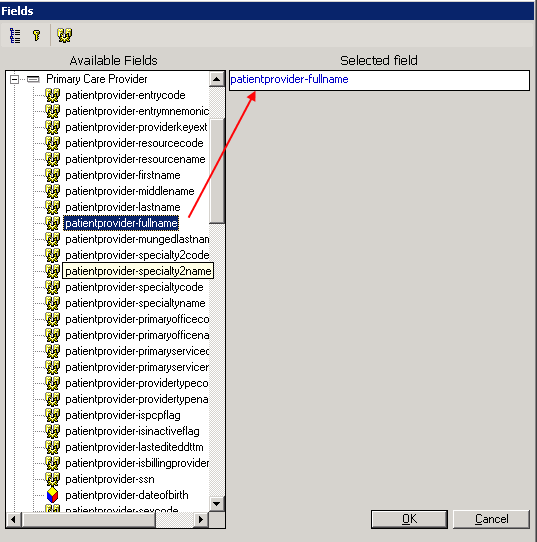
Click on the MetaLayer tree icon.
Find the field and double click; it should move to Selected field.
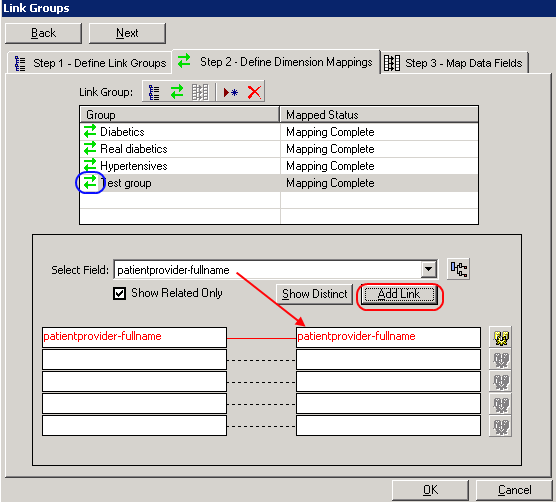
The field name will now show up in the link group window. Click Add Link and the field will move into the mapped area. Once this is complete, there should be two green arrows next to the link group name.
Drill Through Worksheets
Crosstabs provide a great deal of overview and comparison information, but even with slice dimensions, it's sometimes difficult to display the desired information. Drill through worksheets offer the ability to view additional data about a subset of the crosstab data. This is especially handy when many providers want the same data about their patients. A drill through worksheet can be very useful, but as with many other parts of analytics, even this can be setup to make data access simpler and quicker.
A drill through worksheet can be defined for a particular crosstab; this allows users to quickly access that worksheet without having to rebuild it each time. The requirements to add a drill through worksheet are:
- The crosstab must be saved prior to adding the worksheet
- The worksheet must be created and saved prior to addition
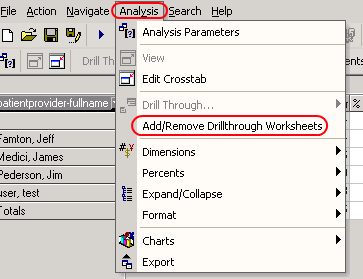
Under the Analysis tab (from either the crosstab edit screen or the data screen), select Add/Remove Drillthrough Worksheets.
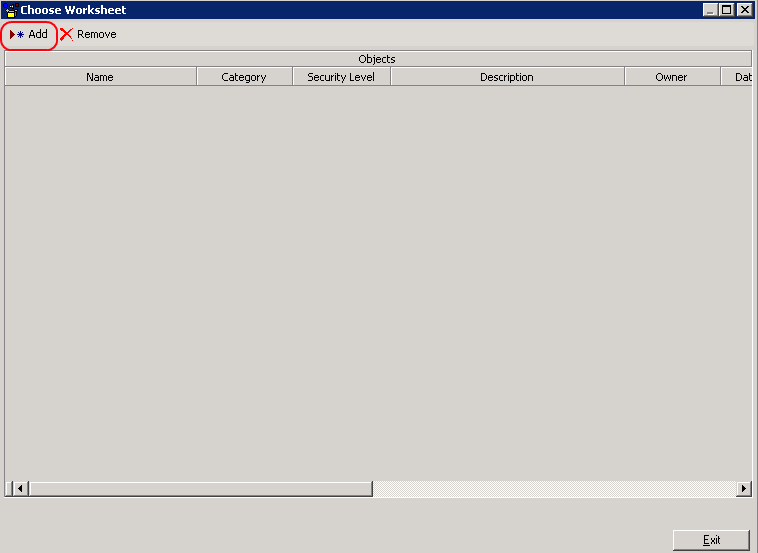
Click on the Add button when the Choose Worksheet screen pops up.
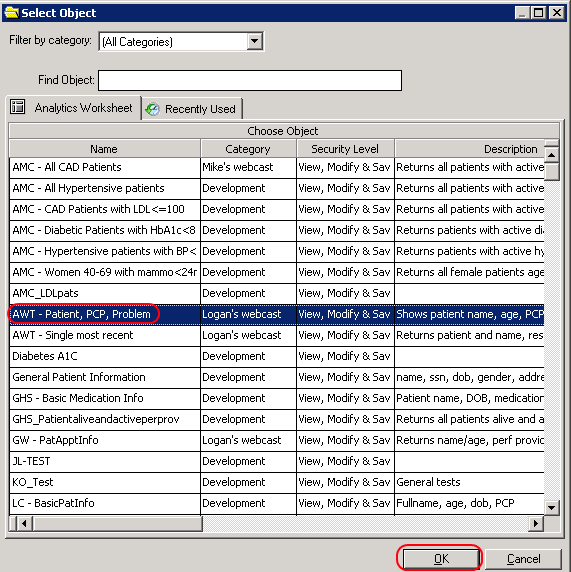
Select the desired worksheet from the list.
Click OK. The worksheet has now been added.
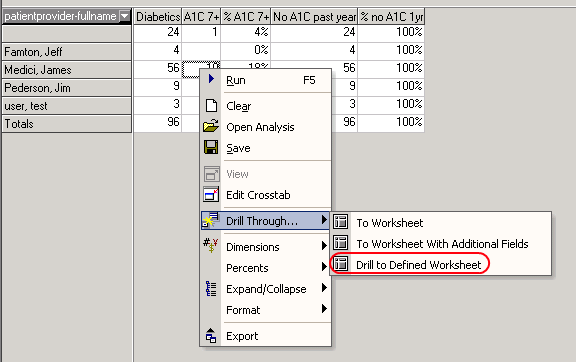
Right click on a data cell and look at the Drill Through section; Drill to Defined Worksheet will now be available.
Select that and the worksheet will be visible. Select the new worksheet and click OK; this will bring up the worksheet screen. Click OK and run the worksheet to view.
Removing a defined worksheet is done through the same window used to add worksheets. Simply select the worksheet to remove and click the Remove button.
