Assign Security Classifications to Organization Roles
Build Workbook Notes Creating security classifications for each role (nurse, provider, front desk staff) creates consistency across the system and makes setting up the security for new users easier and quicker in the future.
If locked down, make sure that your System Administrators and individuals doing build work have a security classification that includes the following codes: Worklist Editor, WorkListAdmin,, Physician Administration Tool Admin, Chart-Alert-Edit, Workspace View-Edit , Clinical Desktop View-Edit, ChartViewer View-Edit, Worklist View – Edit, Note View – Edit
Concepts
Security Classifications (keyrings) can be used to grant the same security to a group of users such as all users with the same role. Assigning security to roles rather than individual users will make it easier to create and update security settings. The consultant and client should work together to define the roles within the organization taking care not to combine roles. Security classifications (keyrings) can then be created for each role.
Security Gates (the gate) are at the organizational level and simply control whether a function can be restricted or not.
Security Codes (keys) can be assigned to a user or classification (keyring) and allow users with that classification to pass through the corresponding security gate.
For example if the gate 'printchart' is locked, only users assigned the corresponding security code (key) can print charts. If the gate is unlocked than all users can print charts.
Security Gate Definitions
High Level Process
- Define organization roles
- Decide which Gates will be locked for the organization
- Create a Classification (keyring) for each role
- Add appropriate Codes (keys) to the Classification (keyring)
- Assign Classifications (keyrings) to users based on role
- Lock the Gates with the Codes (keys)
Example Overview
In the following sections we will create a new security classification called 'GHS ROLE' then assign it to 1 user (idamon) via TW and 5 users (adermott, ahsuser, bjones, ceisner and csnapp) via SSMT.
Assigning Security Classifications to a user in TW will allow you to easily view the data you'll need when assigning the Security Classifications via SSMT. You'll see this when we extract the data.
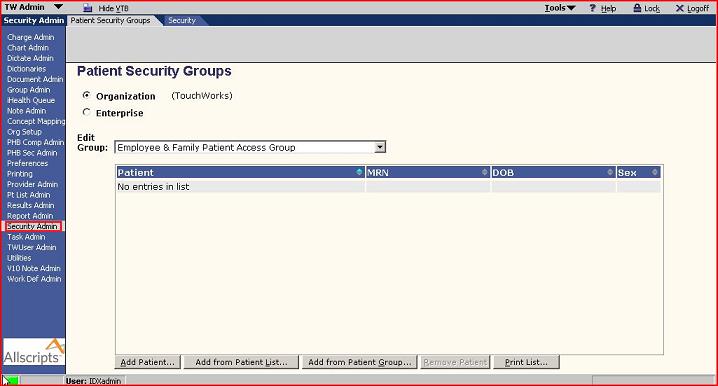
Access 'Sec Admin' workspace
Login to TW as TWAdmin
Select 'Sec Admin' in the VTB
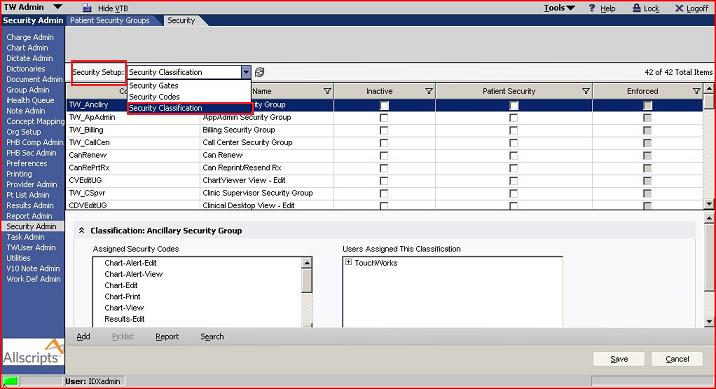
Select 'Security' tab in the HTB
Choose 'Security Classification' from the 'Security Setup' Drop Down Menu
Create a New Security Classification (keyring)
Click Add (lower left)
Enter GHS ROLE as the NAME Enter GHSrole as the CODE
Inactive: If the Inactive flag has been checked for a security code, it will not appear on the Assign Codes to Classifications form.
Patient Security: Refers to a list of patients in a selected patient access group (e.g. Employee and Family Patient Access Group)
Enforced: Those entries that cannot be modified when the box is checked.
Highlight GHS ROLE
Add appropriate Codes (keys) to the Classification (keyring)
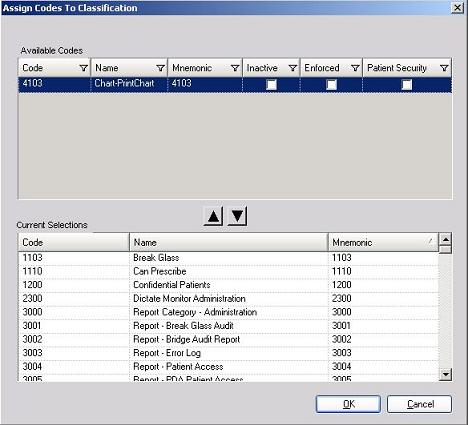
Click the 'Assign Codes' button. (Button in lower left of lower window, scroll down to view if not visible)
For example: To grant all security access except 'Chart-PrintChart' to this new classification called GHS ROLE. We would simply move everything from "Available Codes" to "Current Selection" except for 'Chart-PrintChart' using the Down Arrow.
Click OK.
Assign a Security Classification (keyring) to a User via TouchWorks
- Highlight the classification you wish to add the user to
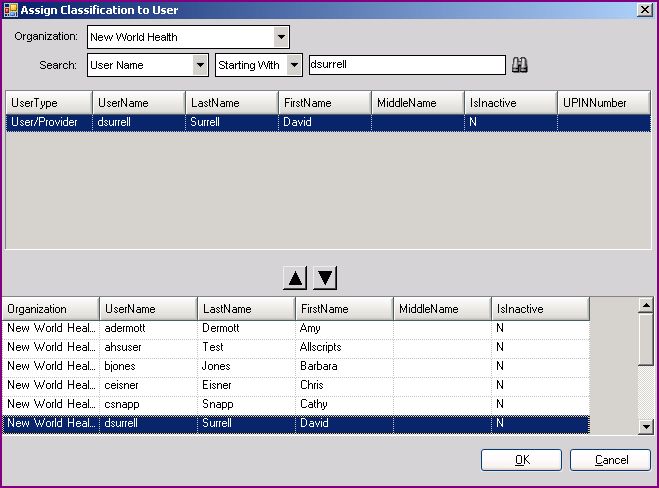
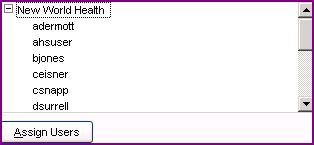
- Click 'Assign Users' button
- Search for the user you want to assign
- Highlight the user
- Move the user down to the bottom section using the "down Arrow"
6. Click OK
You should now see your user as one the of "Assigned users" in the Assign user box.
7. Click Save.
Assign a Security Classification (keyring) to Users via SSMT
In the above example a new security classification was created and assigned to a user via the 'Sec Admin' Workspace.
The following example shows how to take a classification assigned to one user and assign it to others.
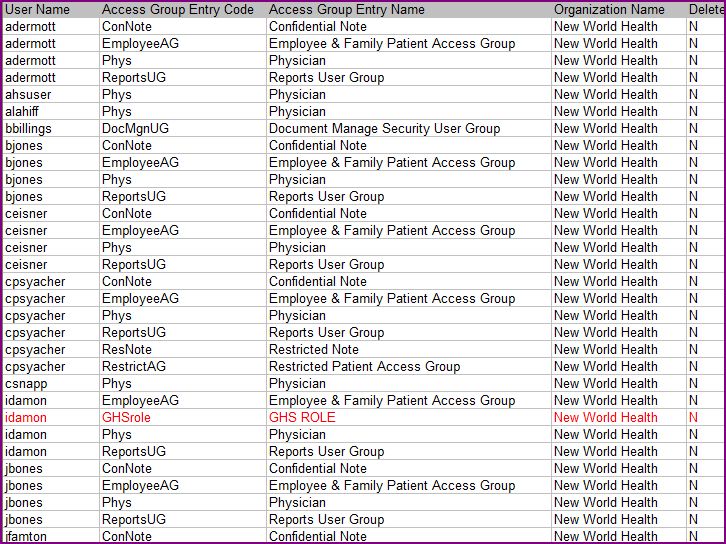
1. Extract the 'User Security Classifications' data from TouchWorks via SSMT
2. Paste the extracted data into Excel
3. Search for the security classification you wish to assign under "Access Group Entry Name", in this example 'GHS ROLE'. If you know of a user with the classification you wish to assign you can search for that user. In this example the security classification GHS ROLE has been assigned to idamon.
4. Insert a new row for every user you want to add this Security Classification to.
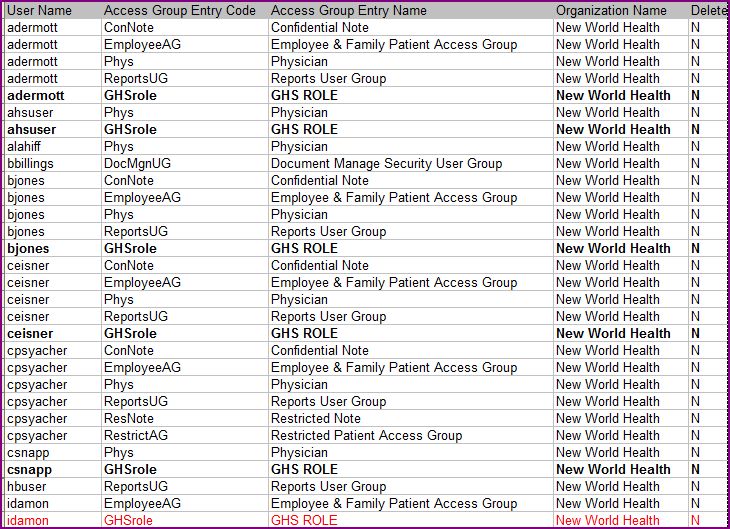
5. Copy the user's existing data into the newly inserted row and change the "Access Group Entry Code" and the "Access Group Entry Name" values to the new classification based on the already assigned user. In this example to GHSrole and GHS ROLE. (see examples in bold below)
6. Load the data back into TouchWorks via SSMT
Verify data loaded properly
- Login to TouchWorks as TWAdmin
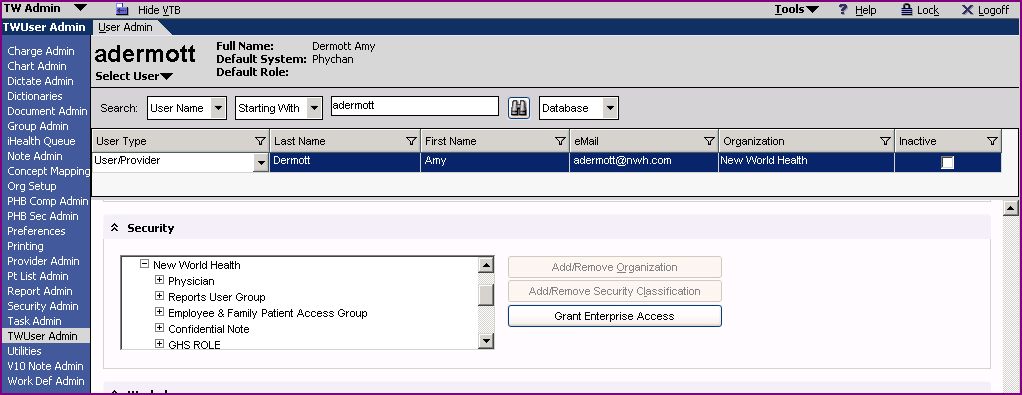
- Click on TWUser Admin on the VTB
- Search for a user you added the Security Classification GHS ROLE to in SSMT. For this example I will use adermott.
- Verify GHS ROLE appears in the Security section for this user.
Lock Security Gates
The pre-existing security gates are activated by applying the corresponding Security Code to the Gate
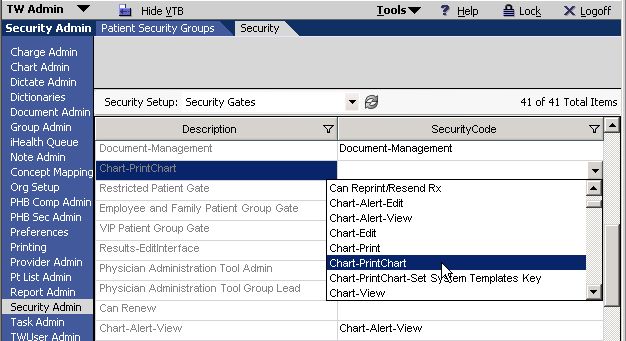
This example will demonstrate how to restrict access for users to print a patient’s entire chart. Using the predefined security gate and security code printing an entire chart will be locked down by the code Chart-Print-Chart.
1. Access the Security tab within Security Admin
2. Select Security Gates from the 'Security Setup:' dropdown menu
3. Locate the Security Gate to be locked in the list. (for this example, look for 'Chart-PrintChart')
4. Select the corresponding Security Code (key) from the dropdown. Most Security Codes mirror the Security Gate name.
5. Click Save
Note: If a security code for one or more security gates is changed and then another security gate/security code is highlighted before saving, the original security gates/codes will turn magenta to remind the user of their changes. Pressing save will commit all the changes in magenta.
Other Resources
Allscripts KB Article 3136 v11.0.1 ITT TouchWorks Security Guide Assign Security Classifications to users via TW or SSMT
Allscripts Enterprise EHR 11.4.1 Configuration Guide System Security 10/9/2013
Return to V10 to V11.2 Build Workbook (BW)
Back to Security
