Difference between revisions of "Patient Photo in Patient Profile Workflow"
Jump to navigation
Jump to search
(Created page with "=How to display patient photo= In the TWAdmin workspace, navigate to Preferences. Select the General preference Display patient photo and set to Y. [[Image:Preference Display Pa...") |
|||
| (2 intermediate revisions by one other user not shown) | |||
| Line 1: | Line 1: | ||
=How to display patient photo= | =How to display patient photo= | ||
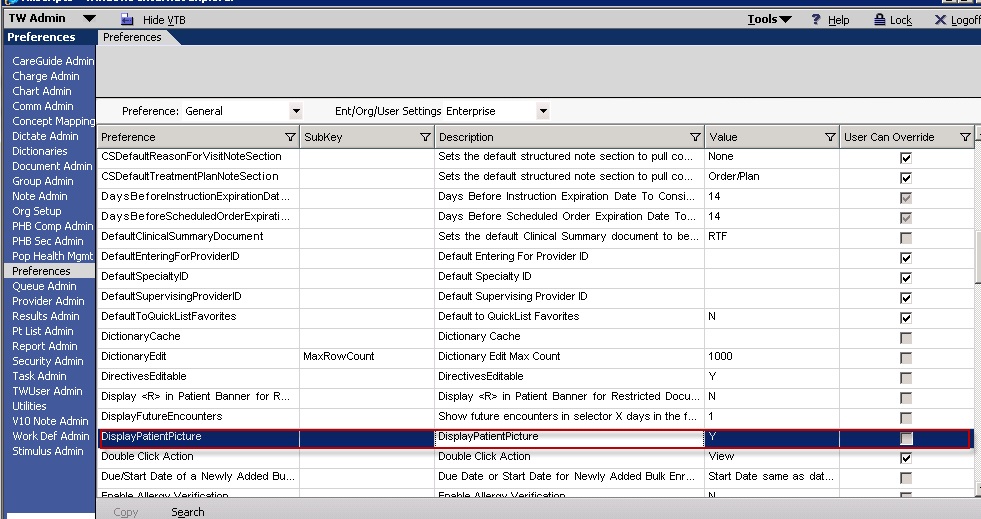
| − | In the TWAdmin workspace, navigate to Preferences. Select the General preference Display patient photo and set to Y. [[Image:Preference Display Patient Photo.jpg]] | + | In the [[TWAdmin]] workspace, navigate to Preferences. Select the General preference Display patient photo and set to Y. [[Image:Preference Display Patient Photo.jpg]] |
| − | |||
| − | |||
| − | |||
| − | |||
| − | |||
| − | |||
| − | |||
| − | + | ||
| − | Clearing a patient photo | + | Inserting a patient photo<br> |
| − | To clear a patient photo from the Patient Profile page, do the following: | + | *To insert a patient photo, do the following:<br> |
| − | On the Patient Profile, click Update. | + | *Click on the Patient Profile (i). <br> |
| − | On the Open Dialog page, click Cancel. | + | *On the Patient Profile, click Update. <br> |
| − | On the Confirm message, click OK to clear the existing photo. | + | *Select the appropriate file.<br> |
| + | *Click OK. The photo is displayed on the Patient Profile page.<br> | ||
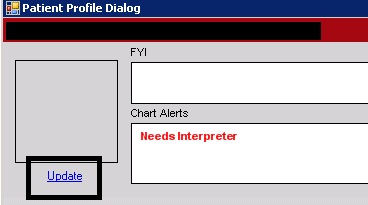
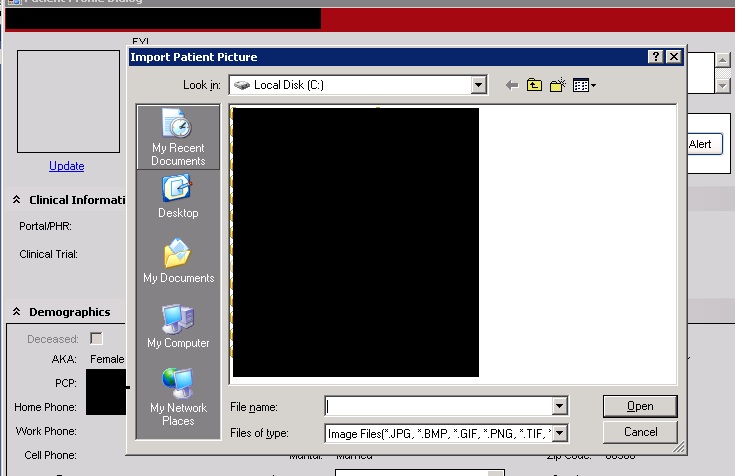
| + | [[Image:Patient Photo-Workflow Update.jpg]] [[Image:Patient Photo-Workflow File.jpg]] | ||
| + | |||
| + | |||
| + | When a photo file is retrieved, it is scaled to 70x70 and saved in a .jpg format. | ||
| + | *Clearing a patient photo <br> | ||
| + | *To clear a patient photo from the Patient Profile page, do the following:<br> | ||
| + | *On the Patient Profile, click Update. <br> | ||
| + | *On the Open Dialog page, click Cancel. <br> | ||
| + | *On the Confirm message, click OK to clear the existing photo. <br> | ||
Latest revision as of 17:54, 29 May 2012
How to display patient photo
In the TWAdmin workspace, navigate to Preferences. Select the General preference Display patient photo and set to Y. 
Inserting a patient photo
- To insert a patient photo, do the following:
- Click on the Patient Profile (i).
- On the Patient Profile, click Update.
- Select the appropriate file.
- Click OK. The photo is displayed on the Patient Profile page.
When a photo file is retrieved, it is scaled to 70x70 and saved in a .jpg format.
- Clearing a patient photo
- To clear a patient photo from the Patient Profile page, do the following:
- On the Patient Profile, click Update.
- On the Open Dialog page, click Cancel.
- On the Confirm message, click OK to clear the existing photo.

